
Overview
This article provides step-by-step instructions for migrating Warden content filter policies, blacklists, whitelists, and Bayes training data between servers. Before beginning the migration process, ensure you have administrative privileges on both the source and destination environments.
Migrate Content Filter Policies, Blacklists, and Whitelists
Use the Policy Migrator interface to export configurations from a source server and import them into a destination server.
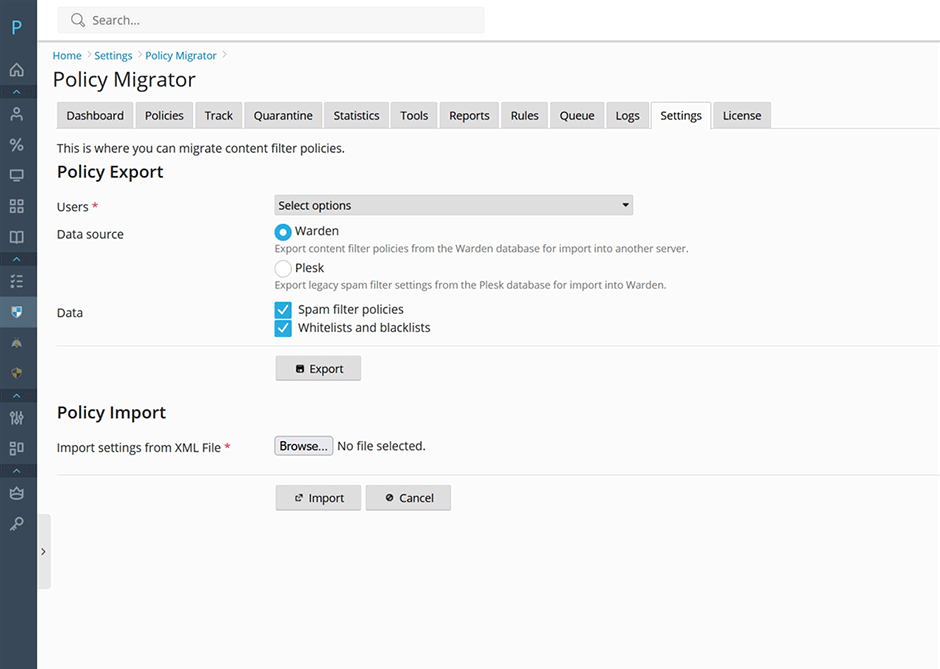
- Navigate to Warden > Settings > Content Filter Settings > Policy Migrator.
- Select the target users for migration.
- Select Warden as the data source.
- Click the Export button and save the generated XML file to your local workstation.
- On the destination server, navigate to Warden > Settings > Content Filter Settings > Policy Migrator.
- In the Policy Import section, click Browse, locate the exported XML file, and select it.
- Click the Import button to apply the configurations to the destination server.
Re-Train Bayes
Once you have your mail migrated you can easily re-train bayes from Warden using the following commands. See here for more information.
// train spam for all domains
warden --task=antispam:train --oper=train_spam --domains=all

// train ham for all domains
warden --task=antispam:train --oper=train_ham --domains=all