
Overview
This article outlines the procedure for managing email rejections caused by DNS Blackhole Lists (DNSBL) within the Warden mail security system. When a sending server IP is listed on a configured DNSBL, incoming traffic will be blocked according to your Plesk spam protection policies.
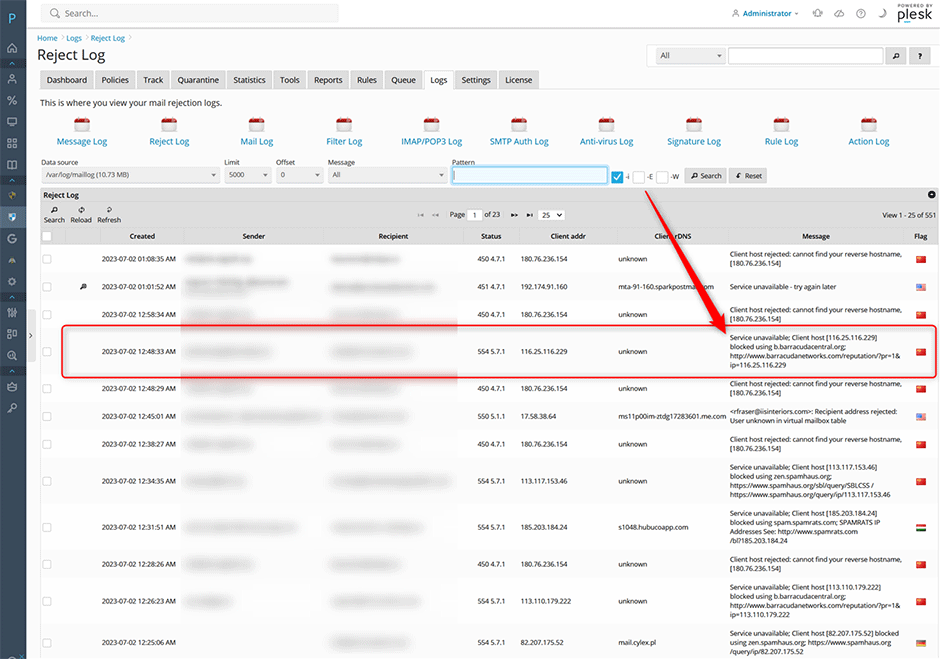
Identifying DNSBL Rejections
DNSBL-related rejections are recorded under Warden -> Reject log. These blocks occur when the sending IP matches an entry in a DNSBL configured via Tools & Settings -> Spam protection based on DNS blackhole lists -> DNS zones for DNSBL service.
Temporary Whitelist Procedure
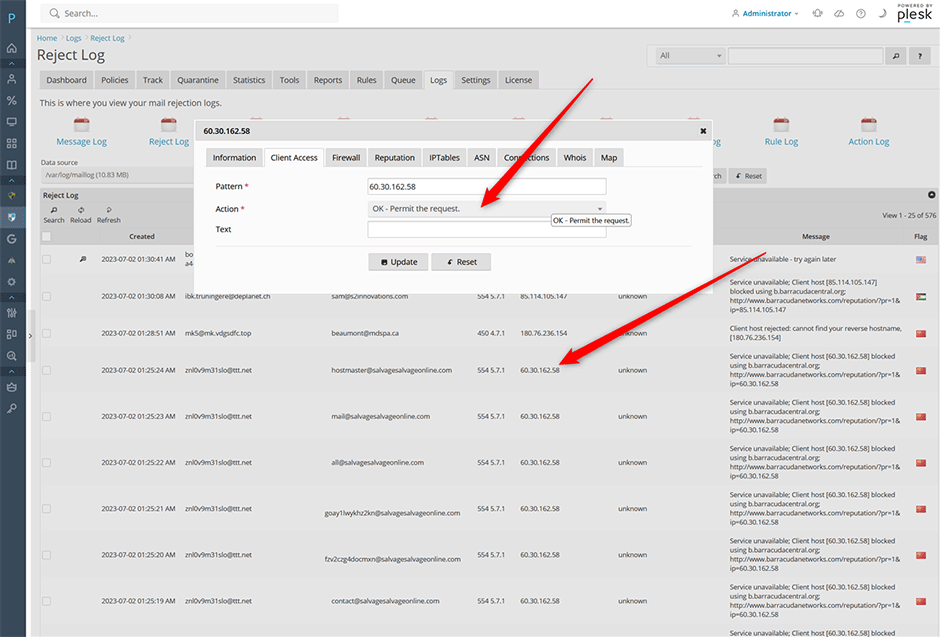
To temporarily allow traffic from a blocked server, perform the following steps:
- Navigate to Client Addr -> Client Access Tab.
- Select OK permit the request.
- Click the Update button to save and apply the temporary whitelist entry.
Permanent Resolution & Cleanup
A temporary whitelist entry only affects your local mail server. To ensure successful delivery across other mail systems that utilize the same DNSBL, coordinate with the sending organization:
- Contact the sender or their postmaster to initiate a delisting request with the respective DNSBL provider.
- Once the sending IP has been successfully removed from the DNSBL, remove the temporary whitelist entry by navigating to Warden -> Settings -> Mail Server -> Mail Server Access -> Client Access and deleting the corresponding record.
Troubleshooting & Notes
Note: Temporary whitelisting does not resolve the underlying DNSBL listing. Failure to coordinate a permanent delist may result in continued delivery failures on third-party mail servers that reference the same blacklist.