
Overview
This article provides step-by-step instructions for enabling Docker support within Juggernaut Firewall and configuring the required network allowances to ensure proper container communication.
Prerequisites
- Administrative access to the Juggernaut Firewall web interface.
- Command-line (SSH) access to the firewall host for service management.
Enable Docker Support
- Navigate to Juggernaut Firewall > Settings > Firewall > Docker Settings.
- Select the Docker checkbox to activate support.
- Click Update to apply the configuration changes.
- Click Restart to reboot the firewall and login failure daemon services.
- Open a terminal session on the host and execute the following command to restart the Docker service:
systemctl restart docker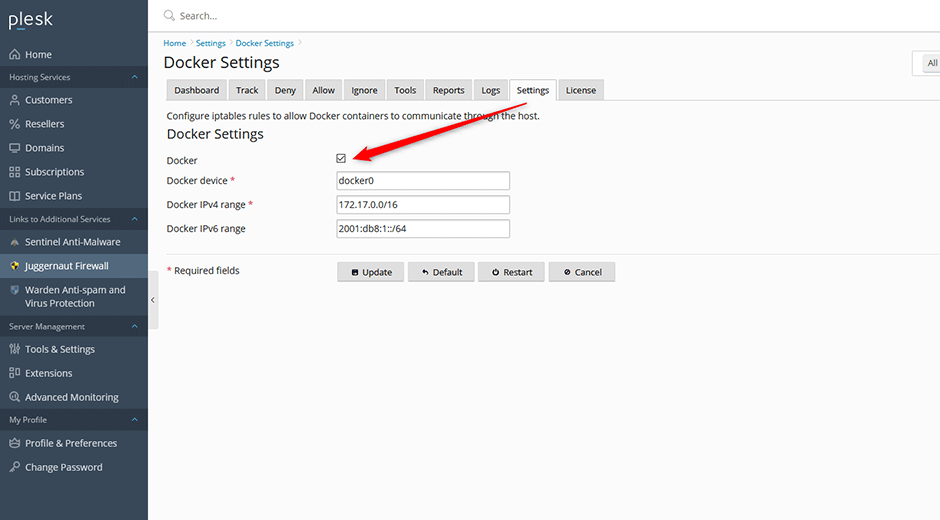
Configure Docker Network Allowances
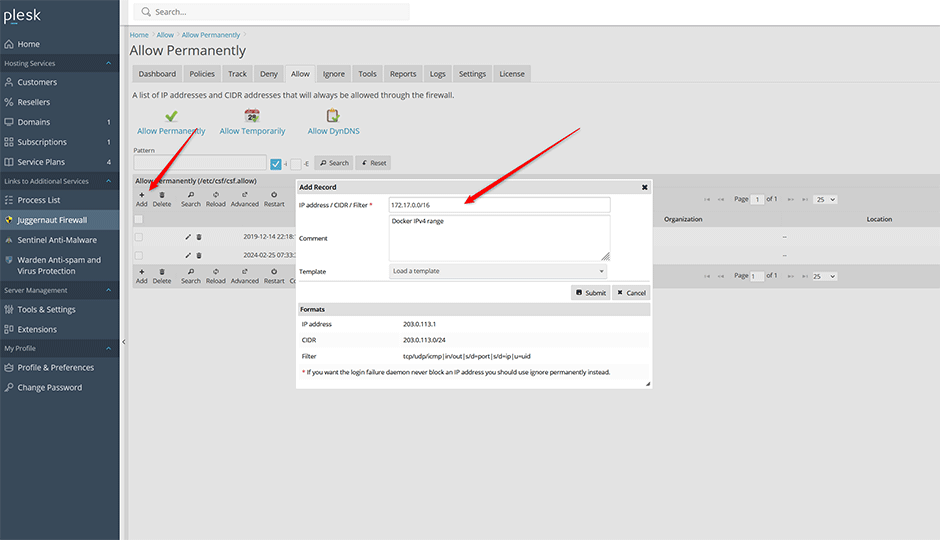
- Navigate to Juggernaut Firewall > Allow > Allow Permanently.
- In the configuration grid, click Add.
- Enter the Docker IPv4 subnet range: 172.17.0.0/16.
- Click Submit to save the rule.
- Repeat steps 2 through 4 for the Docker IPv6 subnet range: 2001:db8:1::/64.
Troubleshooting
- If containers fail to communicate after configuration, verify that the Docker service is active by running
systemctl status docker. - Ensure both IPv4 and IPv6 CIDR ranges are entered exactly as specified in the Allow Permanently grid. Incorrect subnet notation will prevent traffic from passing through the firewall.
- If changes do not take effect immediately, clear the browser cache or perform a hard refresh of the Juggernaut Firewall interface.