
Overview
The Netblock Blocking feature enables automatic, permanent blocking of IP address ranges based on network class. This functionality is designed to mitigate distributed denial-of-service (DDoS) attacks originating from a single network segment.
When enabled, the system monitors individual IP addresses within a specific network class (LF_NETBLOCK_CLASS). If the number of blocked IPs within that class exceeds the threshold defined by LF_NETBLOCK_COUNT during the monitoring window specified in LF_NETBLOCK_INTERVAL (in seconds), the entire network class is permanently blocked.
Configuration Steps
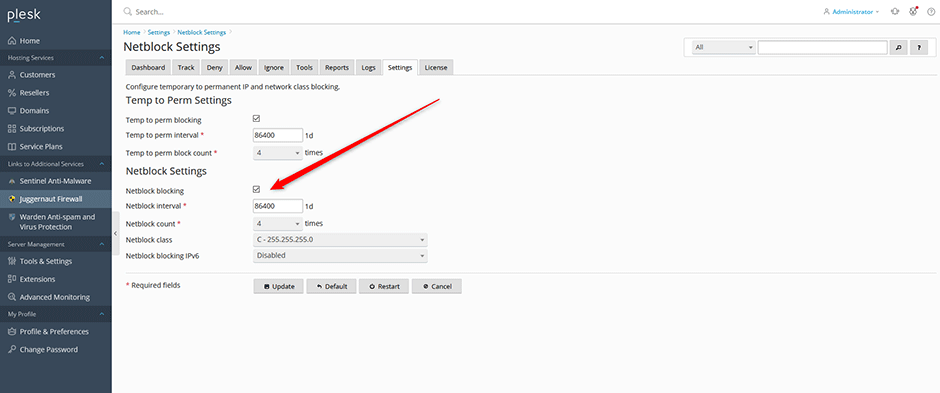
- Navigate to Juggernaut Firewall > Settings > Login Failure Daemon > Netblock Settings.
- Select the Netblock blocking checkbox to enable the feature.
- Enter the desired value for the netblock count threshold.
- Click Update to apply and save the configuration changes.
- Click Restart to restart both the firewall service and the Login Failure Daemon, ensuring the new settings take effect immediately.
Troubleshooting
- Settings not applying: Ensure the firewall and Login Failure Daemon have fully restarted after clicking Restart. Verify that no conflicting IP blocking rules exist in other security modules.
- Unexpected blocks: Review the configured values for LF_NETBLOCK_COUNT and LF_NETBLOCK_INTERVAL. Adjust these thresholds to align with your expected traffic patterns and reduce false positives.