
Overview
This guide details the procedures for integrating AbuseIPDB into your environment to perform IP reputation checks, report malicious activity, and configure automated blocklists using the Juggernaut Firewall extension.
Prerequisites
- An active AbuseIPDB account
- A valid AbuseIPDB API key
- Juggernaut Firewall extension (required for Block Reporting and Login Failure Daemon features)
Configure AbuseIPDB API Integration
- Create a free account at the AbuseIPDB Registration page. The free tier supports up to 1,000 checks per day.
- Generate your API key via the API Management Portal.
- Navigate to Settings -> Network Tools Settings -> Reputation Settings.
- Paste your API key into the AbuseIPDB API key field.
- (Optional) Select the Block Reporting checkbox to enable automatic reporting of failed trigger blocks via the login failure daemon. This feature requires the Juggernaut Firewall extension.
- Click Update to apply the configuration.
Check IP Reputation
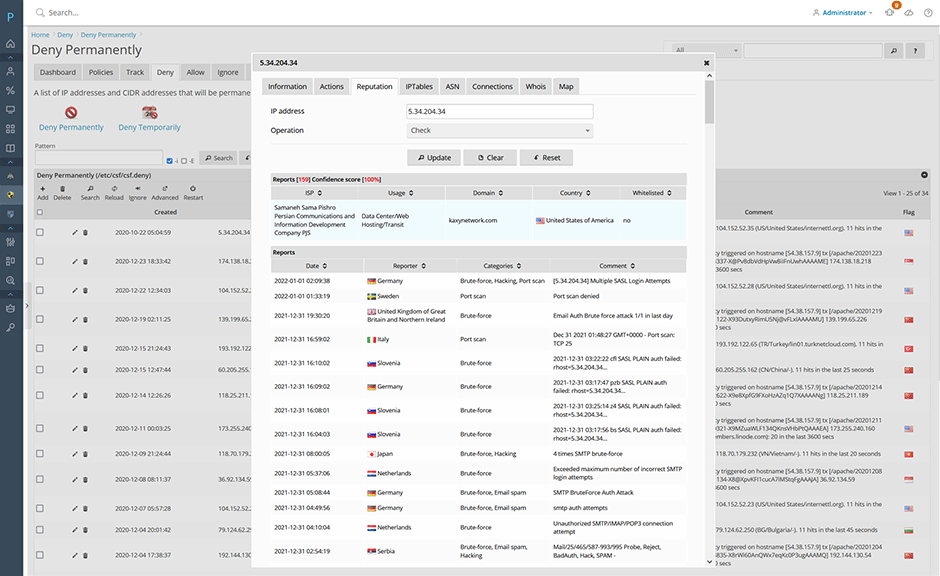
To verify the reputation status of an IP address:
- Select the target IP address from your interface.
- Click Reputation to initiate a lookup against the AbuseIPDB database.
Report an IP Address
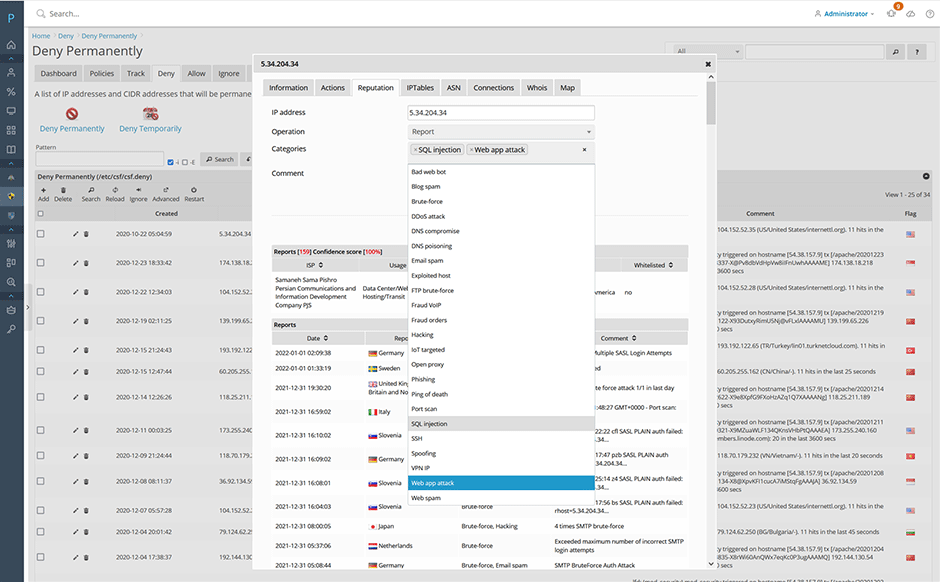
To submit a malicious IP address to AbuseIPDB:
- Select the target IP address.
- Choose Report from the operation dropdown menu.
- Select the applicable abuse categories that describe the activity.
- Submit the report.
Remove a Reported IP Address
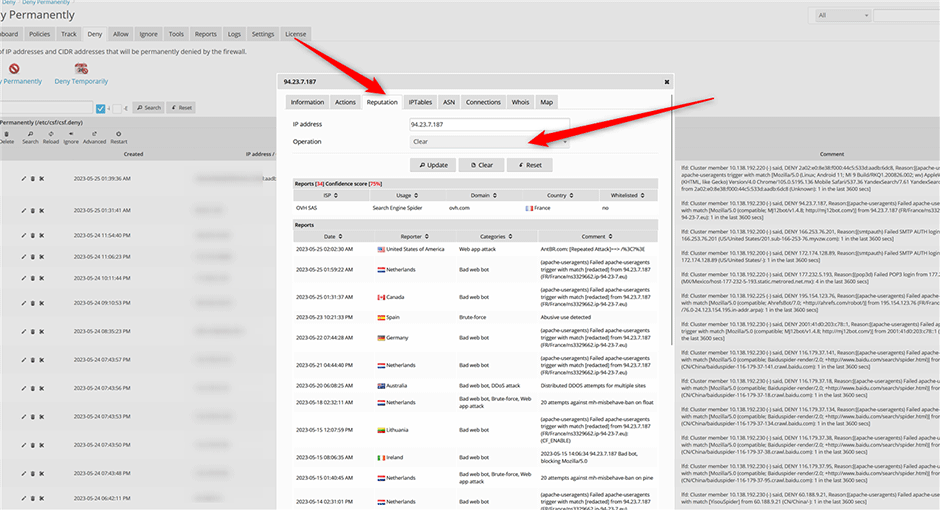
To retract a previously submitted report:
- Select the target IP address.
- Choose Clear from the operation dropdown menu.
Note: The API limits clear operations to 10 per day. For additional removals, refer to the official documentation: Removing Reported IP Addresses.
Enable Block Reporting
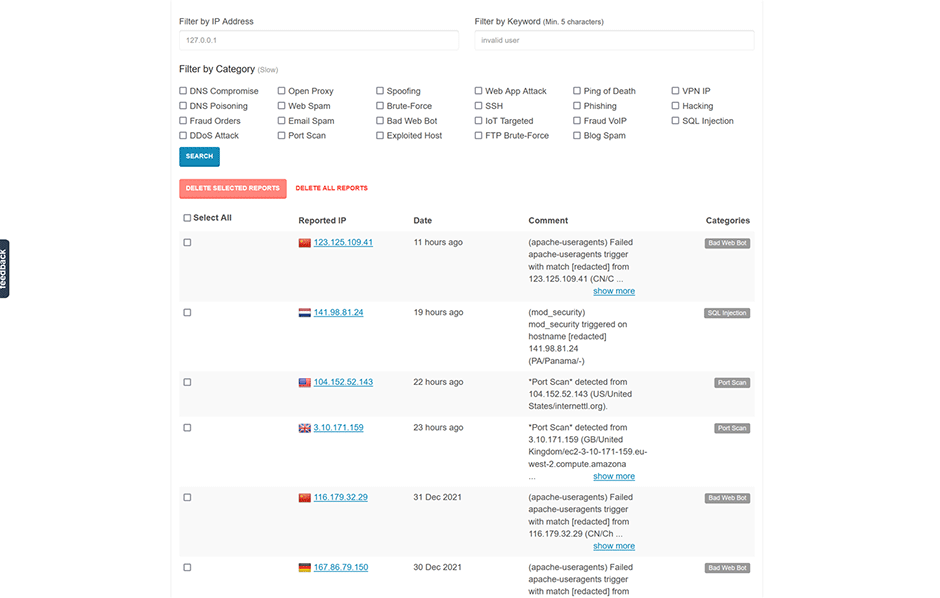
When Block Reporting is enabled, the login failure daemon automatically submits failed trigger blocks to AbuseIPDB. This functionality requires the Juggernaut Firewall extension.
Configure AbuseIPDB Blocklist
- Navigate to Juggernaut Firewall -> Settings -> Login Failure Daemon -> IP Block Lists.
- Click the edit icon adjacent to the AbuseIPDB block list entry.
- In the source URL field, replace YOUR_API_KEY with your actual API key.
- Select the Enabled checkbox and click Submit to save the configuration.
- Click the Restart button on the grid to apply changes. This triggers the login failure daemon to download the updated blocklist.
// Default Source URL
https://api.abuseipdb.com/api/v2/blacklist?plaintext&limit=65000&confidenceMinimum=100&key=YOUR_API_KEY

// Replace YOUR_API_KEY with the API key that you generate
https://api.abuseipdb.com/api/v2/blacklist?plaintext&limit=65000&confidenceMinimum=100&key=db413d60408bd4cba20840285402385sdjfasjdpu09374934gsdfg99de1f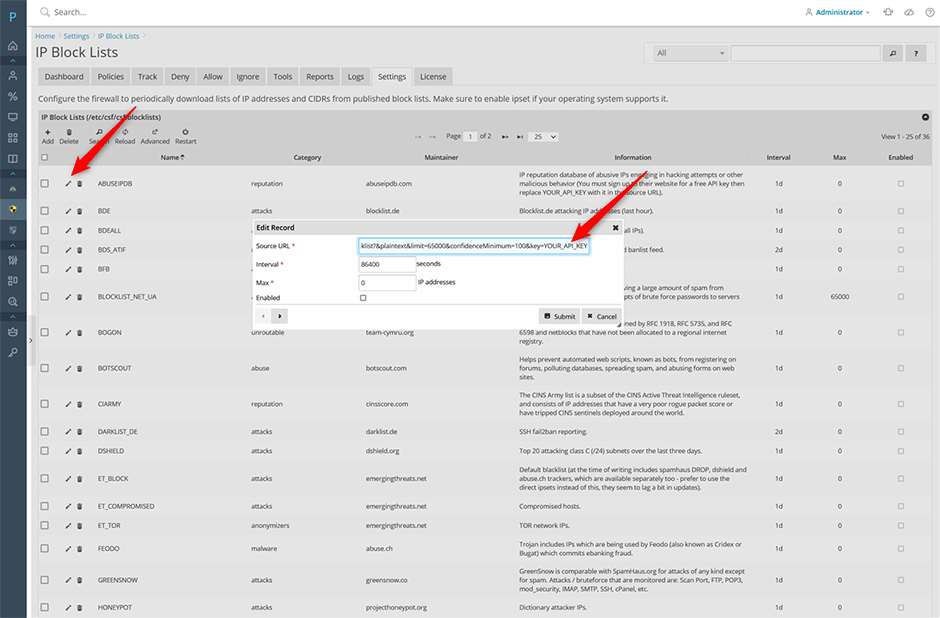
Verify Blocklist Download & Logs
Monitor the blocklist download process via Logs -> LDF log. Successful downloads will display IPSET switching and loading entries:
2022-01-19 01:28:53 PM	5105	IPSET: switching set new_6_ABUSEIPDB to bl_6_ABUSEIPDB
2022-01-19 01:28:53 PM	5105	IPSET: loading set new_6_ABUSEIPDB with 99 entries
2022-01-19 01:28:52 PM	5105	IPSET: switching set new_ABUSEIPDB to bl_ABUSEIPDB
2022-01-19 01:28:52 PM	5105	IPSET: loading set new_ABUSEIPDB with 46914 entries
Blocklist entries are stored in the /var/lib/csf/ directory. CSF automatically optimizes downloaded blocklists by deduplicating IP addresses that already exist in other active lists. To verify the entry count via command line:
# wc -l /var/lib/csf/csf.block.ABUSEIPDB
74140 /var/lib/csf/csf.block.ABUSEIPDB
Free vs. Paid Plan Configuration
The free plan restricts blocklists to a maximum of 10,000 IP addresses. Paid subscribers can increase the volume by adjusting the limit and confidenceMinimum parameters in the source URL.
Important: Before increasing the limit, update the Juggernaut Firewall configuration to prevent ipset capacity errors:
- Navigate to Juggernaut Firewall -> Settings -> General Settings.
- Increase the Ipset maxelem value to exceed your target limit (e.g., 100,000).
// Paid source URL example with limit set to 100,000 IP addresses and a confidenceMinimum set to 75
https://api.abuseipdb.com/api/v2/blacklist?plaintext&limit=100000&confidenceMinimum=75&key=db413d60408bd4cba20840285402385sdjfasjdpu09374934gsdfg99de1f
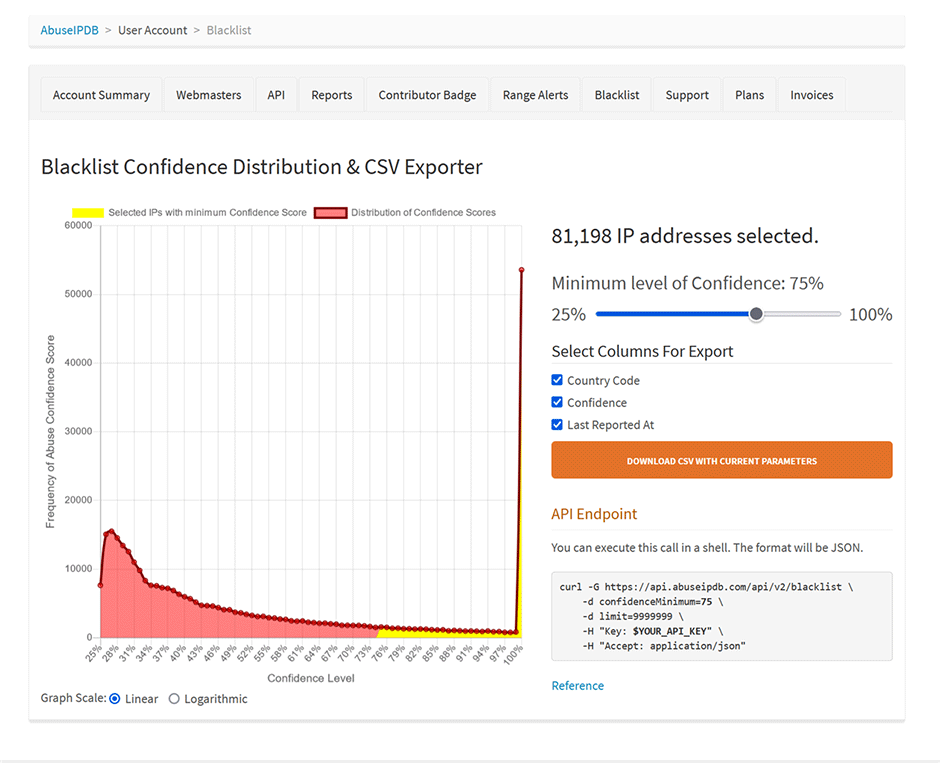
To determine the optimal confidence threshold for your use case, review the IP distribution graph available at the AbuseIPDB Blacklist Dashboard.
Troubleshooting
- Blocklist fails to load: Verify that the Ipset maxelem value in Juggernaut Firewall General Settings exceeds the total number of IPs defined by your API limit.
- Duplicate IP warnings: CSF automatically deduplicates entries across blocklists. This is expected behavior and does not indicate an error.
- Clear operation limit reached: The AbuseIPDB API restricts report removals to 10 per day. Exceeding this requires manual intervention via the AbuseIPDB web portal.