
Overview
This article provides instructions for managing mail server exceptions within the Warden greylisting system. Administrators can whitelist trusted servers to bypass greylisting delays or blacklist specific servers to enforce immediate rejection.
Prerequisites
- Administrative access to the Warden interface.
- The reverse DNS (rDNS/PTR record) of the target mail server(s).
Whitelist a Mail Server From Greylisting
To allow a trusted mail server to bypass greylisting delays, follow these steps:
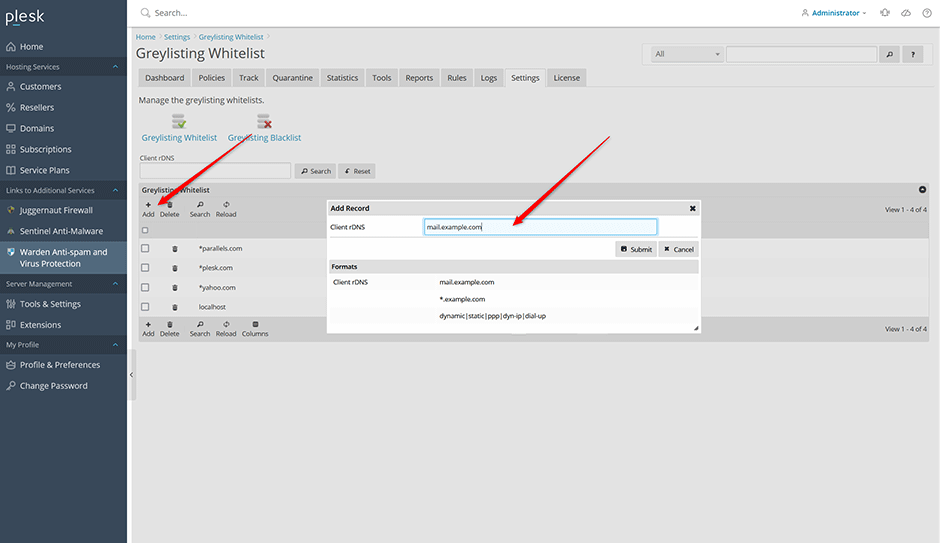
- Navigate to Warden > Settings > Greylisting Whitelist.
- Click the Add button.
- In the input field, enter the client rDNS (PTR record) of the mail server. Wildcard patterns are supported (e.g., *.example.com).
- Click Submit to save the configuration.
Blacklist a Mail Server From Greylisting
To enforce immediate rejection for specific mail servers, follow these steps:
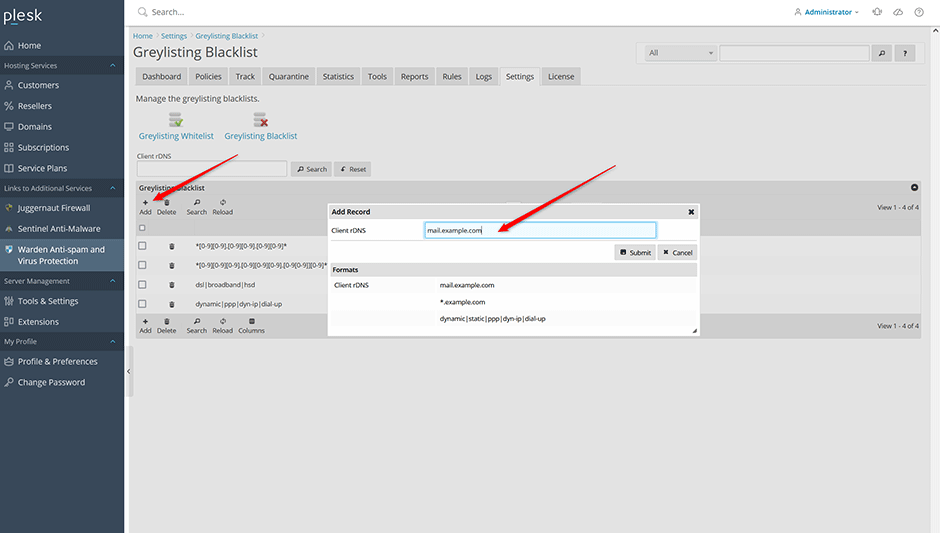
- Navigate to Warden > Settings > Greylisting Blacklist.
- Click the Add button.
- In the input field, enter the client rDNS (PTR record) of the mail server. Wildcard patterns are supported (e.g., *.example.com). You may also specify multiple patterns separated by pipes (e.g., dynamic|static|ppp|dyn-ip|dial-up).
- Click Submit to save the configuration.
Verification and Log Review
Blacklisted mail servers will be recorded in the system logs. To verify that a server has been successfully blacklisted:
- Navigate to Warden > Logs > Reject Log.
- Locate entries corresponding to the blacklisted server.
- Confirm that the entry displays the following status and message:
Status: 451 4.7.1
Message: Command rejected
Troubleshooting
If greylisting exceptions are not applying as expected, verify the following:
- Ensure the rDNS (PTR record) entered exactly matches the server's reverse DNS resolution.
- Confirm that wildcard patterns use valid syntax and do not contain typos or unsupported characters.
- Check the Warden > Logs > Reject Log for real-time status updates after configuration changes.